
Intended Audience: AudioEye Customers who have the Managed Plan (This does not include Duda and Vendasta customers).
Before you begin
- The integration works with Jira Cloud. Self-hosted Jira (Server or Data Center) is not supported.
- You need a Jira Cloud account with access to the project where tickets should be created. If the project does not exist yet, create it in Jira first.
- Connecting Jira and managing export configurations requires the Admin role in the AudioEye Platform. Team members without the Admin role can still export issues once the integration is set up.
- AudioEye requests permission to read and create Jira work items on your behalf. It does not request admin or delete permissions in Jira.
Set up the integration
Step 1: Connect your Jira account
- Log in to the AudioEye Platform.
- Go to your account settings and open Integrations.
- On the Jira card, select Connect to Jira.
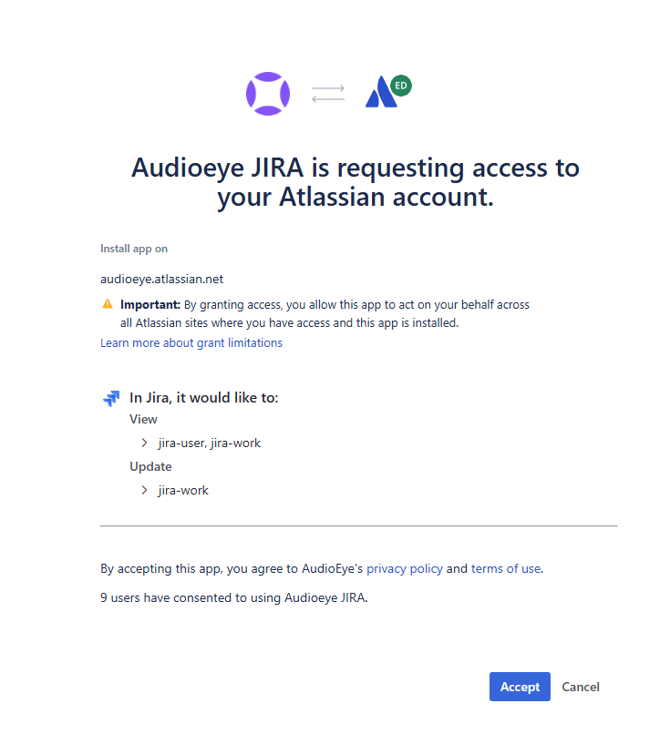
- Sign in to Atlassian if prompted, review the requested permissions, and accept.
- Atlassian returns you to the AudioEye Platform. The Jira card now shows Connected.
Step 2: Create a configuration
A configuration saves where exported issues should go so you do not have to pick a project every time. You can save more than one, for example one per team or per Jira project.
- On the Jira card, select Configure Jira.
- Select Add configuration.
- Fill in the fields:
- Name: a label for this configuration, shown when you export.
- Cloud site: the Jira site where tickets will be created.
- Project name: search for and select the Jira project.
- Issue type: the type of ticket to create, such as Task or Bug.
- Parent issue for tickets (optional): search for an existing Jira issue. When set, exported tickets are created as child issues under it.
- Select Save Configuration.
You can also connect Jira and create your first configuration directly from the export dialog the first time you export from a report.
Export issues to Jira
-
In the AudioEye Platform, open the issue report for your site.
-
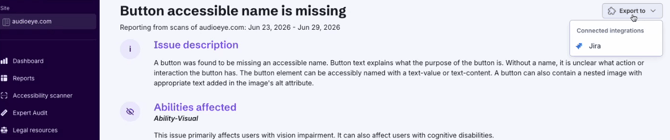
Select Export to in the top right corner and choose Jira. Exporting from the report view sends the issues currently shown in the table. To send a single issue, open that issue first and export from its detail page.
-
If a Jira account has not been connected yet, you will be asked to authorize access first.
-
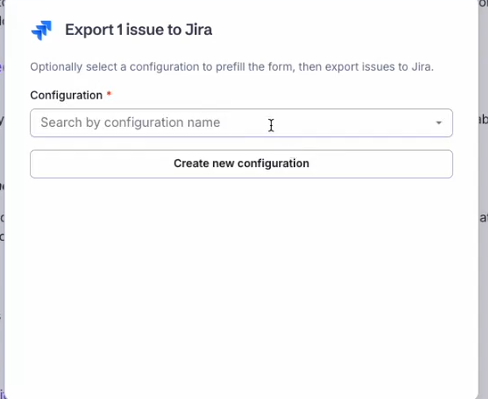
In the export dialog, select one of your saved configurations, or select Create new configuration.
-
Review the export settings. Changes made here apply to this export only and are not saved to the configuration.
-
Select Export issues.
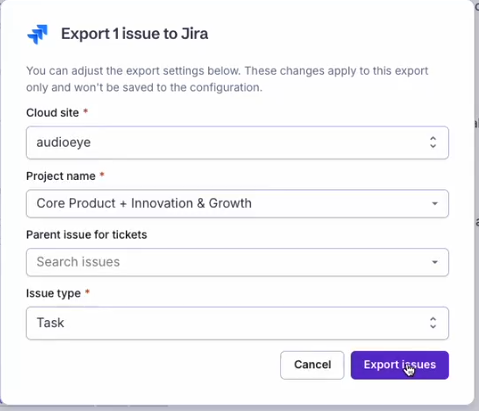
AudioEye creates one Jira ticket for each exported issue. When the export finishes, a confirmation appears with a View in Jira link that opens all of the new tickets in Jira.
What each ticket contains
- The accessibility issue title and your site's domain as the ticket summary
- A description of the issue
- The affected pages and how much of the issue is resolved on each
- Guidance for fixing the issue at the source
- The impact of the issue
- The related accessibility standard, such as the WCAG success criterion, with a link to the specification
Manage the integration
- Edit or delete a configuration: go to Integrations, select Configure Jira, then use Edit or Delete next to the configuration.
- Reconnect: if AudioEye's access expires or is revoked in Atlassian, the AudioEye Platform shows a Reconnect to Jira prompt in place of the export form. Select it and authorize access again.
- Disconnect: in Configure Jira, use the Disconnect integration section to remove the connection.
Troubleshooting
Buttons in the integration settings are disabled. Connecting Jira and managing configurations require the Admin role. Ask an Admin on your account to set up the integration.
A message says your Jira connection has expired. Select Reconnect to Jira and authorize access again. This can happen when access is revoked from your Atlassian account settings.